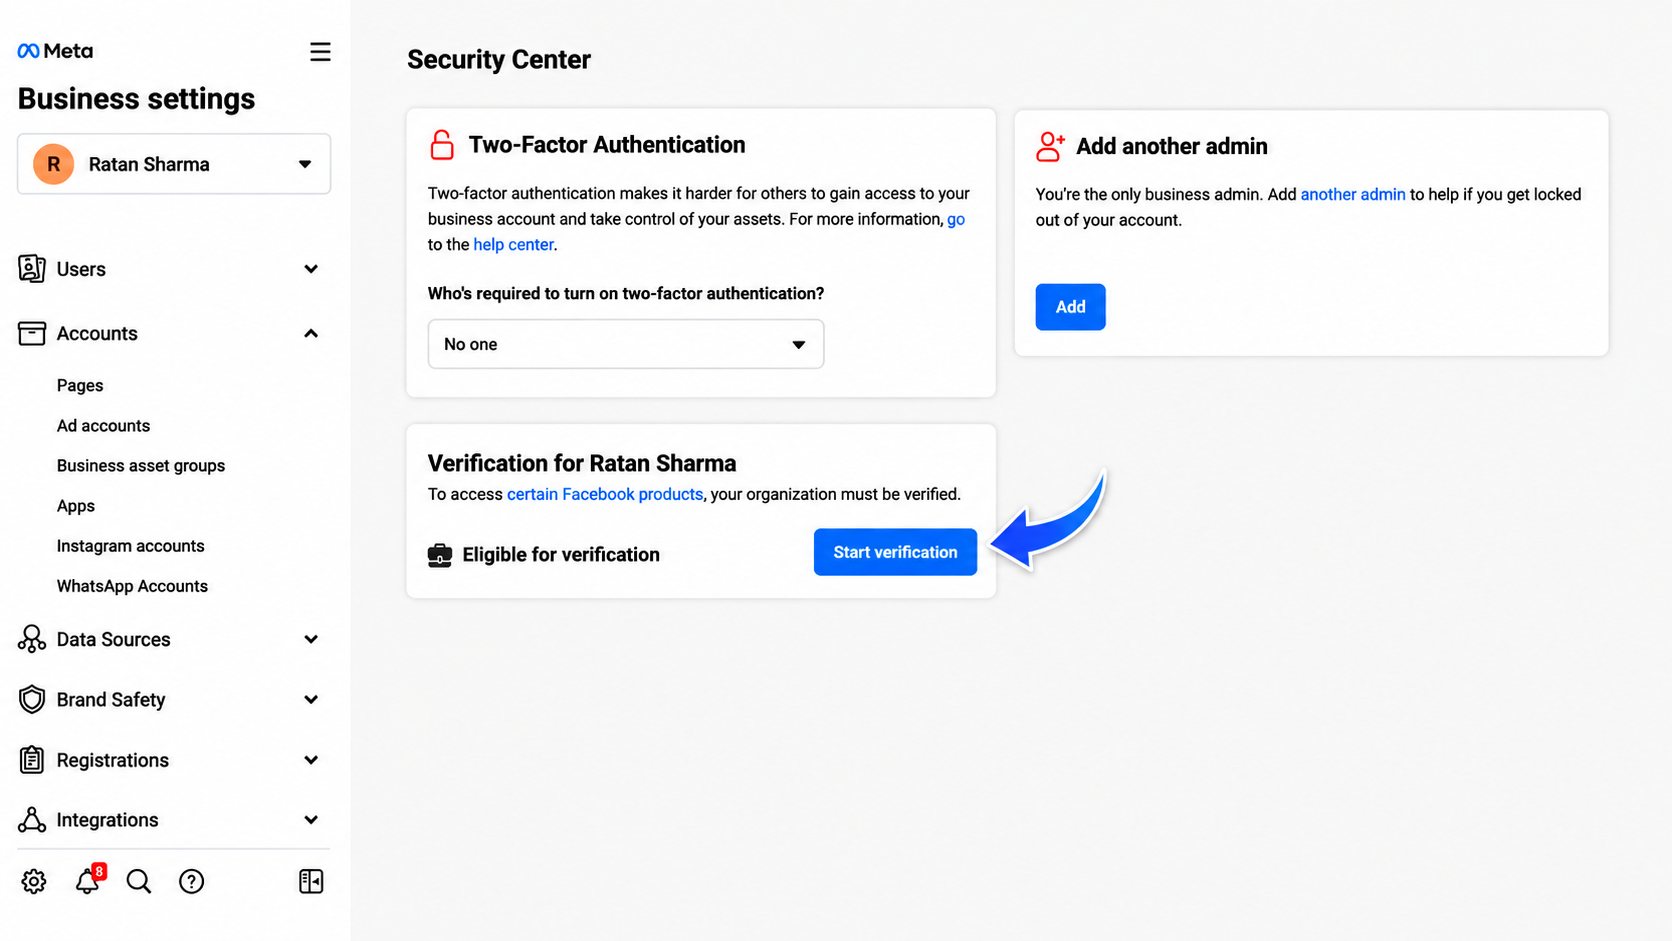
Go to the Facebook Business Security Center.


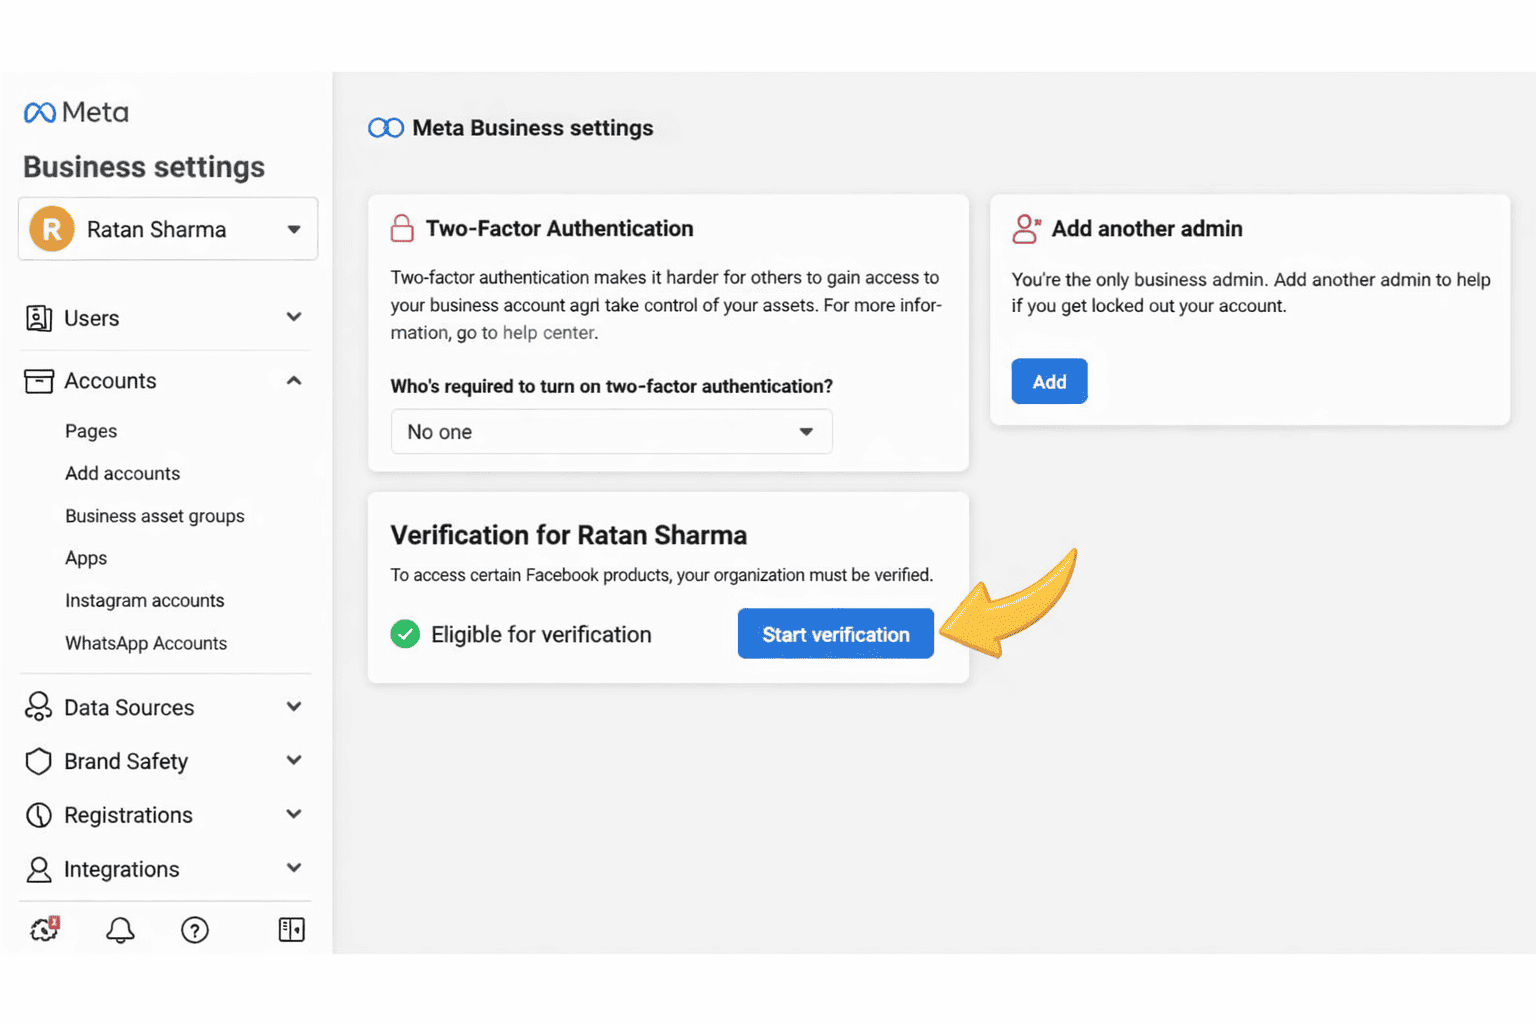
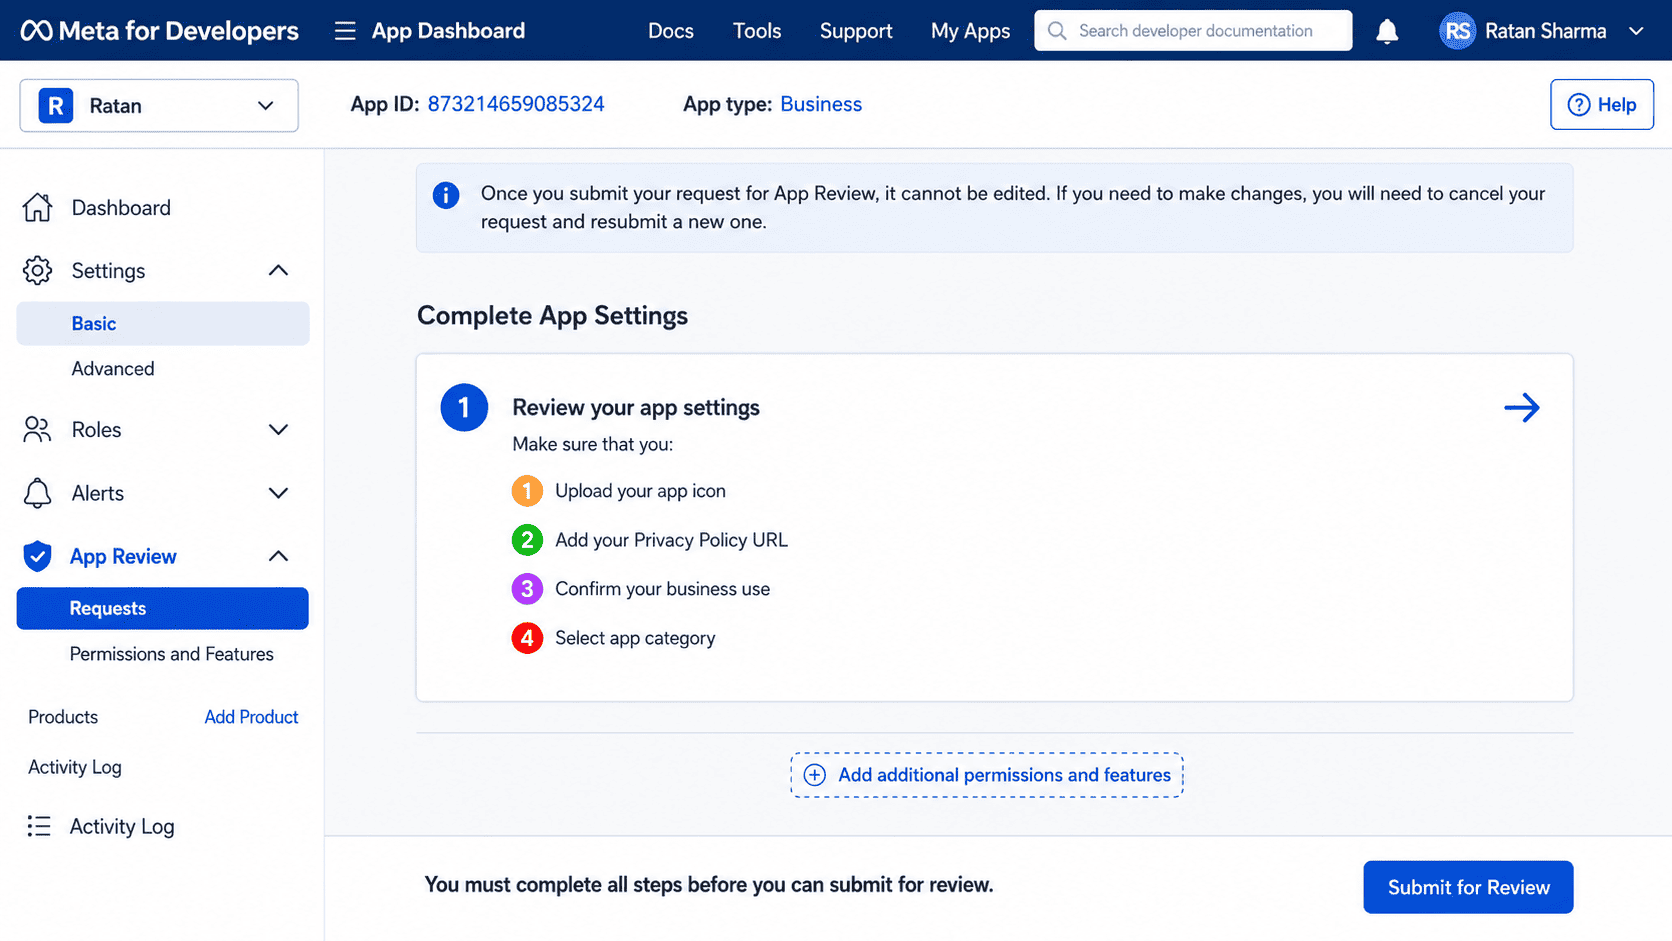
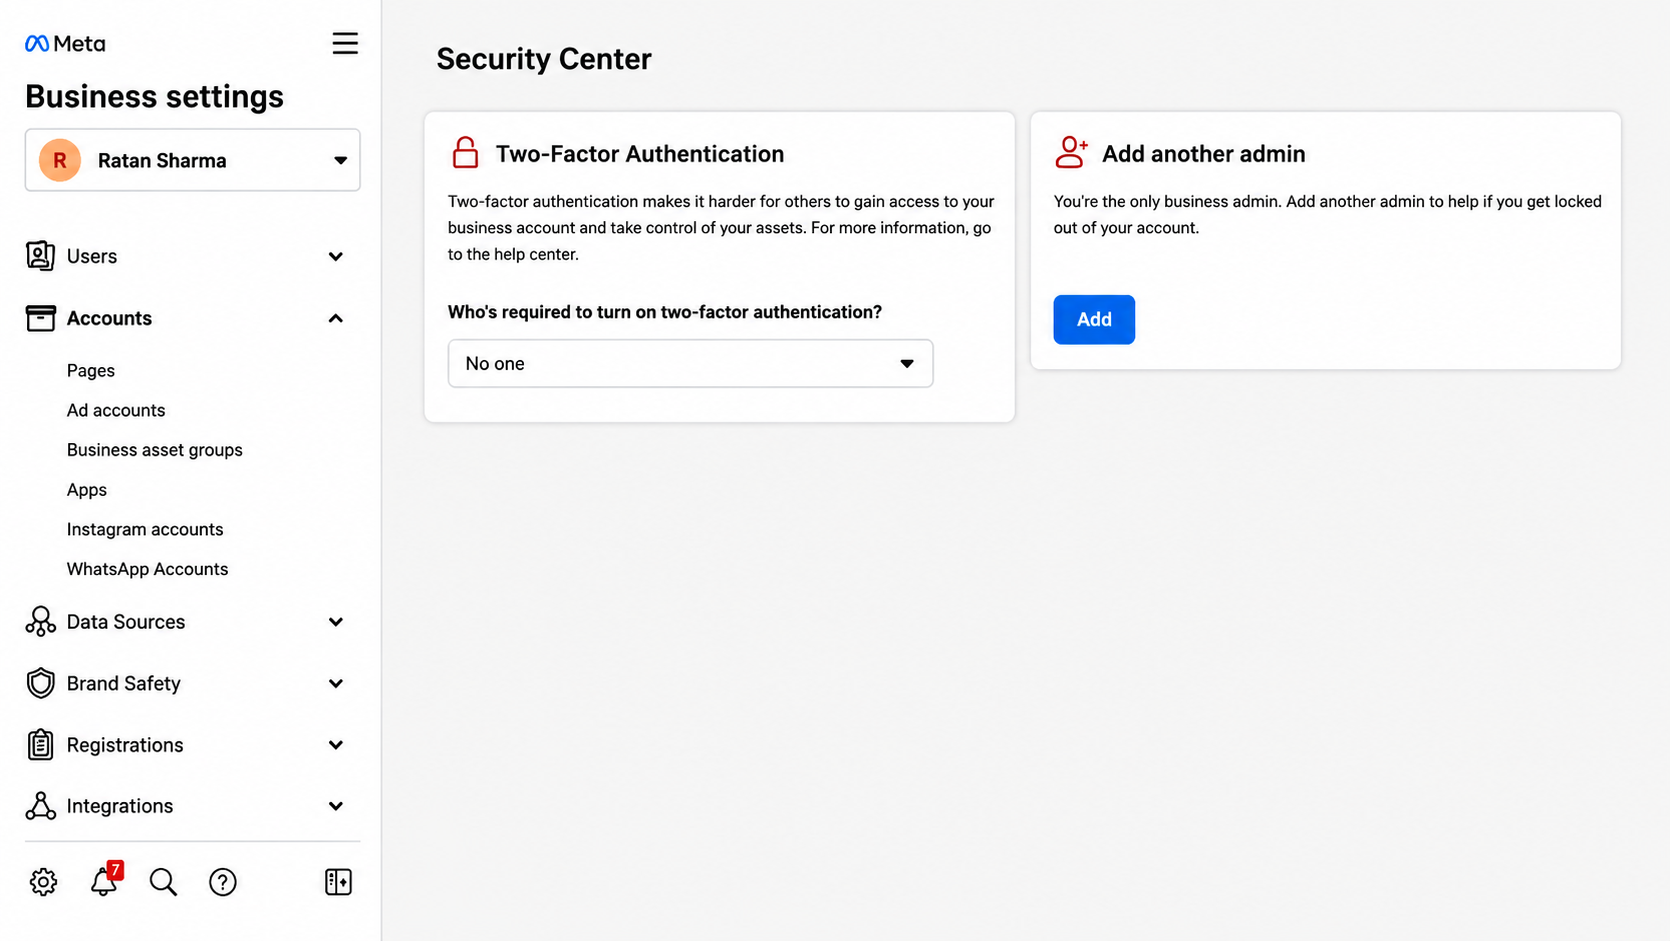
As shown in the image on the right, the “Start Verification” button is currently not visible.
Follow the same steps to fix the issue if the “Start Verification” button is greyed out or not appearing.

Click the button below to open the Facebook Business Security Center.

Connect Your Facebook Page to Business Manager

First, go to the “Pages” section and add your business’s Facebook Page. If your Facebook Page is already connected, you can skip to the next step.

Make sure you only add or select a page where you currently have admin access. Without admin permissions, you will not be able to complete Facebook Business Verification.

Go to Apps

Now, navigate to the “Apps” section and click the “Add” button. If the “Create a New App ID” button appears locked, follow these steps. Hover your cursor over the button and click the “Confirm Account” option to unlock it. Once you click the “Confirm Account” button, a new tab will open.

Confirm Your Account

Click “Continue” to verify your account. On the next screen, check the “I Agree” box and confirm your email address. Enter your business email ID where you would like to receive updates and communication from the Facebook team. Finally, select the option that best describes your role. If you are the founder of the business, you can choose “Owner & Founder,” then click “Complete Registration.”

Create an App

After clicking the “Confirm Application” button, you will be redirected to a new page, as shown in the image on the left. Click “Create App” and proceed to the next step.

Choose an App Type

In this step, select the app type that best matches your business needs. We recommend choosing “Business” as the app type. After selecting the app type, click “Next” to continue.

Add Your Business Display Name

Enter your Business Display Name in this step. Please note that this is not your final business display name. It will only be used as the app name linked to your App ID. After entering the display name, add your email address and click “Create App.” You will then be prompted to enter your Facebook password for confirmation. Once verified, you’ll be redirected to the next screen.

Your App Has Now Been Created

Next, head over to business.facebook.com/settings and open the Security Center section. Refresh the page, and you should see the Start Verification button appear. If the button still isn’t visible, simply follow the additional steps provided below.

Go to App Review

On the next screen, select App Review and then click on Permissions and Features.

Request Advanced Access

In the next step, search for Live Video API using the search bar, then click on Request Advanced Access.

Continue the Request

Click on Continue the Request, as highlighted in the image on the right side.

Review App Settings

On the following screen, scroll down and click on Review App Settings.

Complete the Required Details to Submit Your Application

In the next step, fill in the required fields to submit your application. You can skip the website icon section if you do not want to add it. Under the Privacy Policy URL field, enter your website URL as shown in the image on the right. For the App Category, select Business and Pages. Once everything is completed, click Save and submit your application.

Go to Basic Settings

Next, open the Settings menu and select Basic.

Add an App Icon

In the Basic Settings section, scroll down and upload your App Icon. You can use any icon you prefer, but make sure the image dimensions meet the required size guidelines (between 512x512 and 1024x1024). You’ll also have the option to update or change the App Icon later if needed.

Select Your Preferred Platform

After uploading the App Icon, scroll down and click on Add Platform. Choose Website as your platform, then click Next to continue.

Add Your Website URL

If you selected Website as your preferred platform, enter your website URL in the required field and click Save Changes.

Open the Requests Section

Next, navigate to App Review and click on Requests.

Edit the App Review Request

In the App Review Requests section, click on Edit, as highlighted in the image on the right.

Click on ‘Provide Verification Details’

Scroll down on the page and click on Provide Verification Details.

Add a One-Line Description for Your Business

Enter a short one-line description about your website or business, similar to the example shown in the image above. The text in the image is only a sample 🙂, so make sure to write unique content that matches your company profile. Copy this text for the next step, then click Save.

Click the Field Below “Provide Verification Details”

Click on the field located below Provide Verification Details, as highlighted in the image on the left.

Fill in Your Business Information

Copy and paste the same one-line business description you added in the previous step. Next, upload a short demo video of your business, preferably around 10 seconds long. The video does not need to be directly related to your business, but keeping it short will help it upload faster. After that, check the If Approved option and click Save.

Submit Your App for Review

On the next screen, click on Submit for Review. You may be asked to enter your Facebook password for confirmation. Once confirmed, click Submit to complete the process.

Done — You’re All Set 🙂

Now, head back to the Facebook Business Security Settings page by clicking here. Earlier, the Start Verification button was not visible. After completing the previous steps, you should now see the Start Verification button available and clickable. Click on it to begin your Facebook Business Manager Verification process.